 Bellingham
 When a Ferndale Home Actually Needs Full Replacement
Not every siding problem calls for a full tear-off. A cracked board, a section of trim that pulled loose in a windstorm, or a small area of caulk failure can often be repaired without touching the rest of the wall. But there's a point where patching stops making sense — where the siding itself, or what's happening behind it, has moved past the point a repair can actually fix. Knowing which side of that line your home is on is the first real question in any replacement project.
Signs that point toward full replacement rather than another round of patchwork include siding that's soft, delaminating, or crumbling in more than an isolated spot; paint that won't hold no matter how often it's redone; visible warping or buckling across multiple courses; and — the one that matters most in this part of Whatcom County — soft or spongy sheathing behind the siding, which means moisture has already gotten past the surface and is working on the wall assembly itself. If you're seeing that last one, repair isn't really an option anymore; the wall needs to be opened up and rebuilt correctly.
Age Is a Factor, But Not the Only One
Older wood or engineered-wood siding that's been through fifteen-plus wet Pacific Northwest winters is a reasonable candidate for replacement even without dramatic visible damage, simply because moisture exposure is cumulative. But a newer home can also need early replacement if the original installation was done wrong — missing flashing, no drainage gap, siding installed too close to grade. In those cases the material's age isn't the problem; the installation was flawed from day one, and replacement is the only way to correct it.
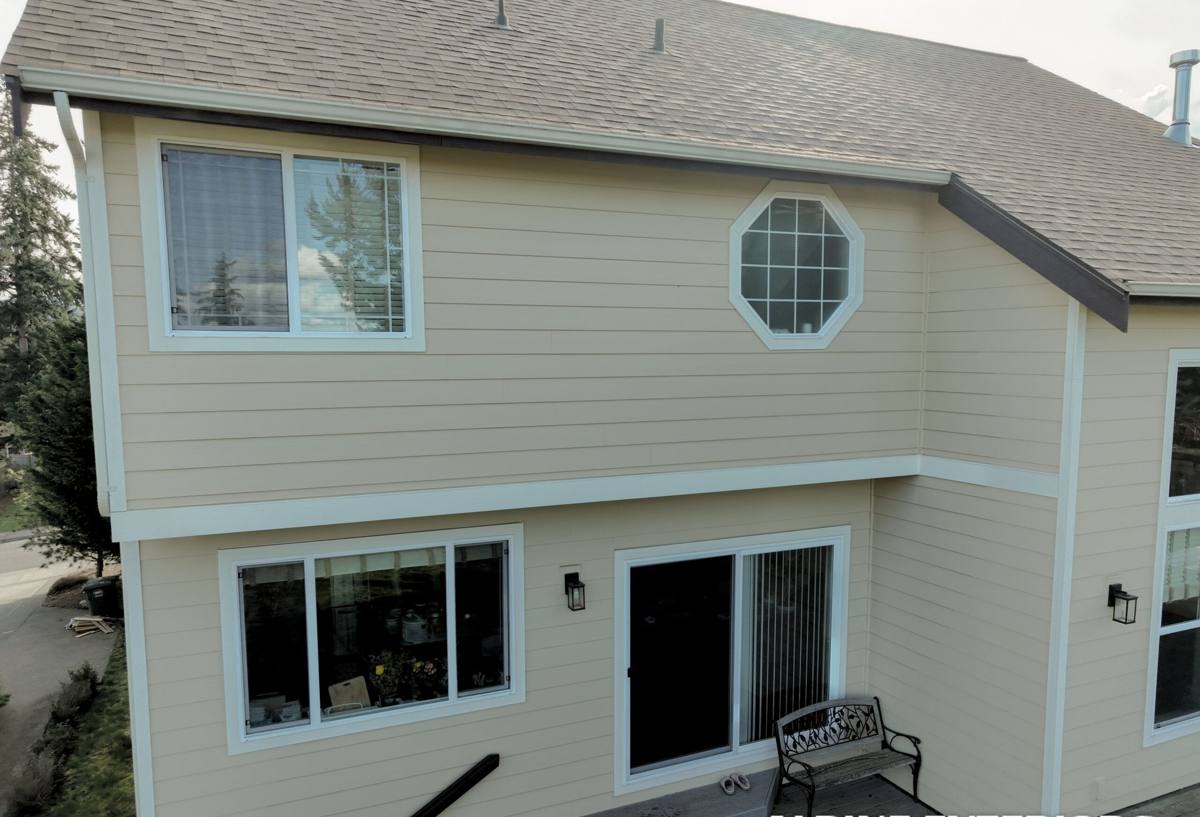
What Ferndale's Climate Does to a Wall Over Time
Ferndale sits close enough to the water that salt-laden air is a routine part of the weather, not an occasional event. Combined with Whatcom County's long, wet winters and a moss season that can stretch across much of the year on shaded or north-facing walls, siding here is under more sustained moisture pressure than siding in a drier inland climate. That pressure doesn't announce itself — it works slowly, behind the surface, until a homeowner notices soft trim, a musty smell near an exterior wall, or paint that keeps failing no matter how it's maintained.
Three specific conditions drive most of what we see on Ferndale replacement projects:
- Salt air corrosion — accelerates rust on fasteners, flashing, and any metal trim that isn't rated for a coastal environment
- Driving rain — wind off the water pushes rain sideways into walls rather than letting it run straight down, which punishes any flashing detail that was installed as an afterthought
- Extended moss and moisture season — shaded and north-facing walls stay damp longer here than in most of the state, which is hard on any siding that doesn't drain and dry quickly
A replacement that doesn't account for these three things is just setting up the next round of failure on a longer timer. That's why the goal of a proper Ferndale siding replacement isn't just "put new material on the wall" — it's building a wall assembly that's actually engineered for this coastline.
What a Correct Siding Replacement Actually Involves
A siding replacement done right is a sequence of steps, and skipping or rushing any one of them is where problems come back a few years later. Here's what should happen, in order, on a full replacement:
- Full tear-off to the sheathing — old siding and trim removed entirely, not covered over. This is the only way to actually see the condition of the wall underneath.
- Sheathing inspection and repair — any rotted, delaminated, or water-damaged sheathing gets cut out and replaced before anything new goes on. Framing around windows and doors gets checked too.
- New water-resistive barrier — a fresh weather barrier installed correctly, lapped and sealed so water sheds outward rather than working its way in at the seams.
- Flashing at every penetration — windows, doors, roof-to-wall transitions, and any other wall penetration get flashed in the correct sequence, not just caulked over.
- Drainage gap installation — a rainscreen or furring detail that lets any moisture that does get behind the siding drain and dry out instead of sitting against the wall.
- Siding installation to manufacturer spec — correct fastener type and spacing, correct clearance at grade and at horizontal surfaces, correct joint treatment.
- Trim, corners, and caulking — the finish details that make a job look intentional and keep water from finding a way in at the edges.
- Final inspection and cleanup — a walkthrough to confirm everything is sealed and finished correctly, plus site cleanup and debris haul-off.
Every one of those steps takes time, and every one of them is a place where a rushed or inexperienced crew can cut a corner that isn't visible until the wall starts failing again — sometimes years down the road, once it's expensive to trace back to the original cause.
Our Process, From First Call to Finished Wall
Assessment and Estimate
We start with an in-person walkthrough of the home — size, shape, existing siding condition, window and door count, and any visible signs of moisture damage. That's also when we flag anything that might affect price, like a shaded wall with visible moss or a section that's clearly seen water intrusion, so there are no surprises later. You get a written scope of work, not just a number.
Prep and Protection
Before tear-off begins, we protect landscaping, walkways, and anything near the work area, and set up staging for material and debris so the job site stays organized rather than chaotic.
Tear-Off and Discovery
Old siding comes off down to the sheathing. This is the point where hidden damage — if there is any — actually becomes visible. If we find rot or moisture damage that wasn't apparent before tear-off, we walk you through it before doing repair work, so you understand what was found and why it needs to be addressed.
Rebuild and Install
Sheathing repair, new water-resistive barrier, flashing, drainage gap, and then the James Hardie siding itself, installed to manufacturer specification. This is the longest phase of the project and the one where careful, unhurried work matters most.
Final Walkthrough and Warranty Registration
We walk the finished job with you, address anything you flag, clean up the site, and handle manufacturer warranty registration so your coverage is active and on file.
Material: Why James Hardie for a Ferndale Replacement
We install James Hardie fiber cement siding exclusively — not vinyl, not LP SmartSide or other engineered-wood products, not cedar or primed spruce. That's a deliberate standard, not a limitation we're apologizing for, and it matters more on a coastal replacement project than almost anywhere else in Whatcom County.
Fiber cement doesn't have a wood-fiber core that can wick moisture at cut edges the way engineered-wood siding can, and it doesn't swell, warp, or support rot the way solid wood siding does over time in a wet climate. It's non-combustible, which matters for insurance and code considerations independent of moisture. And Hardie's ColorPlus factory finish is baked on under controlled conditions, which holds color and resists the kind of chalking and fading that field-applied paint struggles with under years of salt air and UV exposure.
Hardie also isn't a single product — it's a family of lap, shingle-style, and vertical panel profiles, with an HZ5 formulation engineered specifically for colder, wetter climate zones like the Pacific Northwest. Part of a correct replacement estimate is specifying the right line and profile for your home's exposure, not defaulting to whatever's cheapest in the catalog.
Replacement vs. Overlay vs. Repair: How to Think About the Choice
| Approach | What It Actually Does | Best Fit |
|---|---|---|
| Spot repair | Fixes an isolated area of damage without touching the rest of the wall | Small, contained damage with no signs of moisture behind the siding elsewhere |
| Overlay | New siding installed over existing siding, without removing it | Rarely recommended here — it hides whatever condition the old wall is actually in, which is a risk in a wet coastal climate |
| Full tear-off replacement | Removes old siding and trim entirely, inspects and repairs the wall, rebuilds the assembly from the sheathing out | Widespread wear, repeated paint failure, any sign of moisture behind the siding, or an older home due for a full renewal |
For a Ferndale home, we treat full tear-off as the standard recommendation whenever there's any doubt, because it's the only approach that lets us actually verify — rather than guess at — the condition of the wall before committing new siding to it.
What to Expect During the Project
A full siding replacement is disruptive by nature — there's noise, debris, and crew activity around your home for the duration of the job. Knowing what's normal helps set expectations going in:
- Weather can shift the schedule; siding installation needs reasonably dry conditions, and Whatcom County's wetter months mean some flexibility is normal
- Once tear-off starts, expect a short period where the home's exterior looks worse before it looks better — that's normal, not a sign of a problem
- Any hidden sheathing or framing repair found during tear-off should be discussed with you directly, with a clear explanation of scope and cost before work proceeds
- Landscaping, walkways, and outdoor fixtures near the work area should be protected throughout, not just at the start
- Daily site cleanup should be part of the process, not left until the very end
- A final walkthrough should happen before the crew considers the job complete
Why a Crew That Already Works Ferndale Matters
Siding replacement isn't a generic task that performs the same everywhere — a crew that's worked this specific coastline knows what a Ferndale wall is actually up against. That shows up in practical ways: knowing to spec corrosion-resistant fasteners and flashing as standard rather than an upsell, understanding how driving rain off the water behaves differently than rain in a sheltered inland location, and recognizing moss and mildew patterns on shaded walls that an out-of-area crew might not think to plan around.
It also shows up in the less visible parts of the job — knowing Whatcom County's permitting process, understanding local code requirements for exterior work, and having a track record in the area that you can actually check rather than take on faith. A contractor who's regularly doing this work in Ferndale and the surrounding communities has already made and learned from the mistakes that a first-time-in-the-area crew might make on your home instead.
After Replacement: Keeping New Siding Performing
One advantage of a correctly installed fiber cement replacement is how little ongoing maintenance it actually needs compared to wood or engineered-wood siding. Still, a few habits help it perform for the long haul in this climate: keep gutters clear so water isn't sheeting down walls, trim vegetation back from siding to maintain airflow and reduce moss buildup, do a visual walk-around once or twice a year to catch any caulking or trim issues early, and address any impact damage promptly rather than letting it sit. None of this is heavy maintenance — it's the kind of occasional attention that protects the investment you just made.
If your Ferndale home is showing signs it needs more than a patch — or you just want a straight answer on whether repair or full replacement makes sense for your situation — we're glad to walk the property with you and explain exactly what we see. Reach out below for a free, no-pressure estimate.